Why Pressure Washing Before Exterior Painting Is Essential
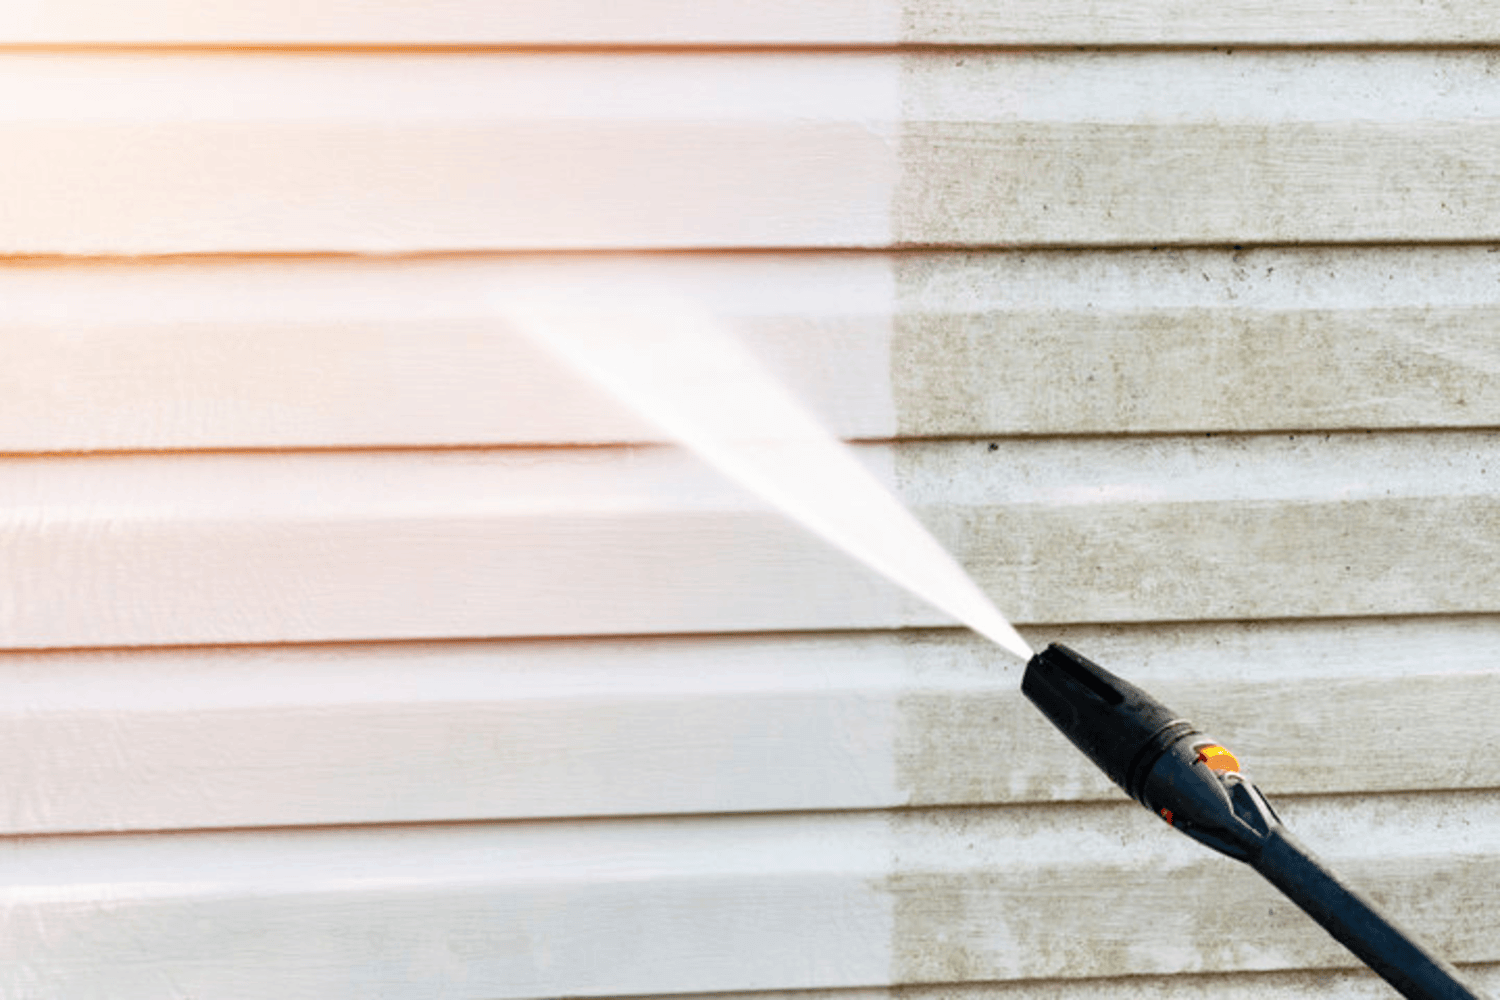
If you’re planning an exterior painting project, you’ve probably heard pressure washing described as a required first step. It’s easy to assume it’s mostly about appearance, a way to make the house look presentable before the crew gets started. The truth is bigger than that.
Why pressure washing before exterior painting matters comes down to one simple fact: paint can only perform as well as the surface it’s applied to. A clean, stable surface is what makes the difference between a paint job that holds up for years and one that starts failing within months.
This guide covers what pressure washing actually removes, why those specific contaminants interfere with paint, what happens when the step gets skipped, and how it fits into a professional exterior painting process.
What Pressure Washing Removes From Your Home’s Exterior
Pressure washing removes several things from exterior surfaces before paint ever goes on:
- Dirt and airborne debris that settles over time
- Mildew and algae growth
- Chalking residue left behind by aging paint
- Loose or flaking paint still clinging to the surface
These contaminants build up gradually, often without being obvious from a distance. A house can look reasonably clean from the street while still carrying a layer of fine dust, chalking, or early mildew growth that only becomes visible up close.
This list is exactly what separates a surface that’s ready for paint from one that merely looks ready. Each item on it interferes with paint in its own way, which is worth understanding before any coat goes on.
Why These Contaminants Undermine Paint Adhesion and Durability
Each of these contaminants interferes with paint differently, but they all come down to the same basic problem. Paint needs direct contact with a stable surface to bond properly. Understanding the specific mechanism behind each one makes it clear why a quick rinse, or a surface that merely looks clean, isn’t the same as a surface that’s actually ready for paint.
Why Dirt and Chalking Prevent Paint From Bonding
Dirt and the fine, chalky residue left behind by aging paint sit between the surface and any new coat. That layer prevents direct contact. Paint needs to bond to the substrate itself, not to loose particles resting on top of it.
A thin layer of dust or chalking can look minor, but paint bonds at a microscopic level. Even a slight barrier weakens that bond significantly. Paint applied over dirt or chalking often looks fine at first. It loses its grip over time, since it was never actually bonded to the surface underneath.
Why Mildew and Algae Compromise a Paint Job
Mildew and algae are living organisms. They keep growing underneath a new coat of paint if they aren’t fully removed first. Painting over active mildew or algae doesn’t kill it. It seals in moisture and organic material that continues growing beneath the surface.
A coat of paint doesn’t neutralize mold or mildew. It can actually accelerate the problem by trapping moisture against the surface. Mildew or algae painted over tends to reappear as discoloration or staining that bleeds through the new paint within a relatively short time.
Why Loose or Failing Paint Can’t Be Painted Over
Any paint that’s already peeling, cracking, or losing its grip needs to come off first. New paint applied on top of it will fail at the same point the old paint did. New paint can only bond as well as what it’s adhered to, and loose paint underneath gives it nothing stable to hold onto.
A fresh coat doesn’t reinforce or stabilize failing paint beneath it. It simply adds weight and stress to an already weak bond. Painting over loose paint typically causes the new coat to fail in the same spots, often faster than the original failure took to develop.
What Happens When Pressure Washing Gets Skipped
When this step gets skipped, the bonding failures described above don’t stay hidden. They surface as visible problems on the house, often within the first year or two rather than holding up for the long term. These outcomes are the downstream result of paint failing to bond properly in the first place. The contaminants don’t disappear just because paint goes on top of them.
These problems rarely show up immediately. A skipped pressure wash often looks fine on day one, which can make it seem like the step wasn’t necessary until the failure appears months later. By then, fixing a prematurely failing paint job typically costs more than the pressure washing would have in the first place, since it usually means removing paint that’s already failed and starting the prep process over again.
Why the North Bay’s Climate Makes This Step Especially Important
Sonoma, Marin, and Napa’s mix of dry, dusty summers and foggy, humid stretches creates ideal conditions for both chalking buildup and mildew or algae growth, often on the same house. Summer dust and airborne debris settle into chalking paint surfaces, while shaded or north-facing walls that stay damp longer in foggy conditions become prime spots for mildew and algae.
A home doesn’t need to sit in an obviously humid or coastal spot to develop these issues. Even inland properties in the region get enough seasonal fog and moisture to support growth in shaded areas. In fact, the timing of pressure washing service in this region is shaped by exactly this pattern, since most buildup accumulates during the rainy winter months and needs to be addressed before the drier season that follows.
Homes in this region often need pressure washing more than a house in a drier, more uniform climate would, simply because of how these two conditions combine throughout the year.
How Pressure Washing Fits Into the Professional Painting Process
Pressure washing happens early in the preparation sequence, before any scraping, sanding, priming, or painting begins. The surface needs time to dry fully before the next steps start. Every later step in the process depends on starting from a clean, stable surface, which is why this step has to come first and has to be done thoroughly.
Pressure washing isn’t an optional add-on service that happens separately from painting. It’s a built-in part of how a professional exterior painting project gets sequenced, alongside other prep steps like:
- Scraping loose or failing paint
- Sanding rough edges and transitions
- Filling cracks and gaps
- Priming bare or repaired areas
A full breakdown of what shapes an exterior painting estimate covers this in more depth, but the short version is that skipping or rushing pressure washing doesn’t just risk the wash itself. It compromises every step that comes after it.
A Clean Surface Is the Foundation of a Paint Job That Lasts
Pressure washing directly determines how well paint bonds, how long it lasts, and how the finished result looks. That’s why it’s treated as essential rather than optional on a professional exterior painting project.
Understanding this step helps set the right expectation when getting quotes or discussing a project with a painting contractor. A quote that skips over surface prep details is worth a second look.
If you’re planning an exterior painting project and want to understand what proper surface preparation looks like for your home, we’d be glad to walk you through it. Reach out to Lavish & Sons Painting Inc. to schedule a consultation or estimate for your exterior painting project.
Leave a Reply